This guide covers Pipecat Cloud-specific configuration for Twilio WebSocket
integration. For a complete guide including dial-in, dial-out, custom
parameters, and advanced features, see the Twilio WebSocket Integration
guide.
How It Works
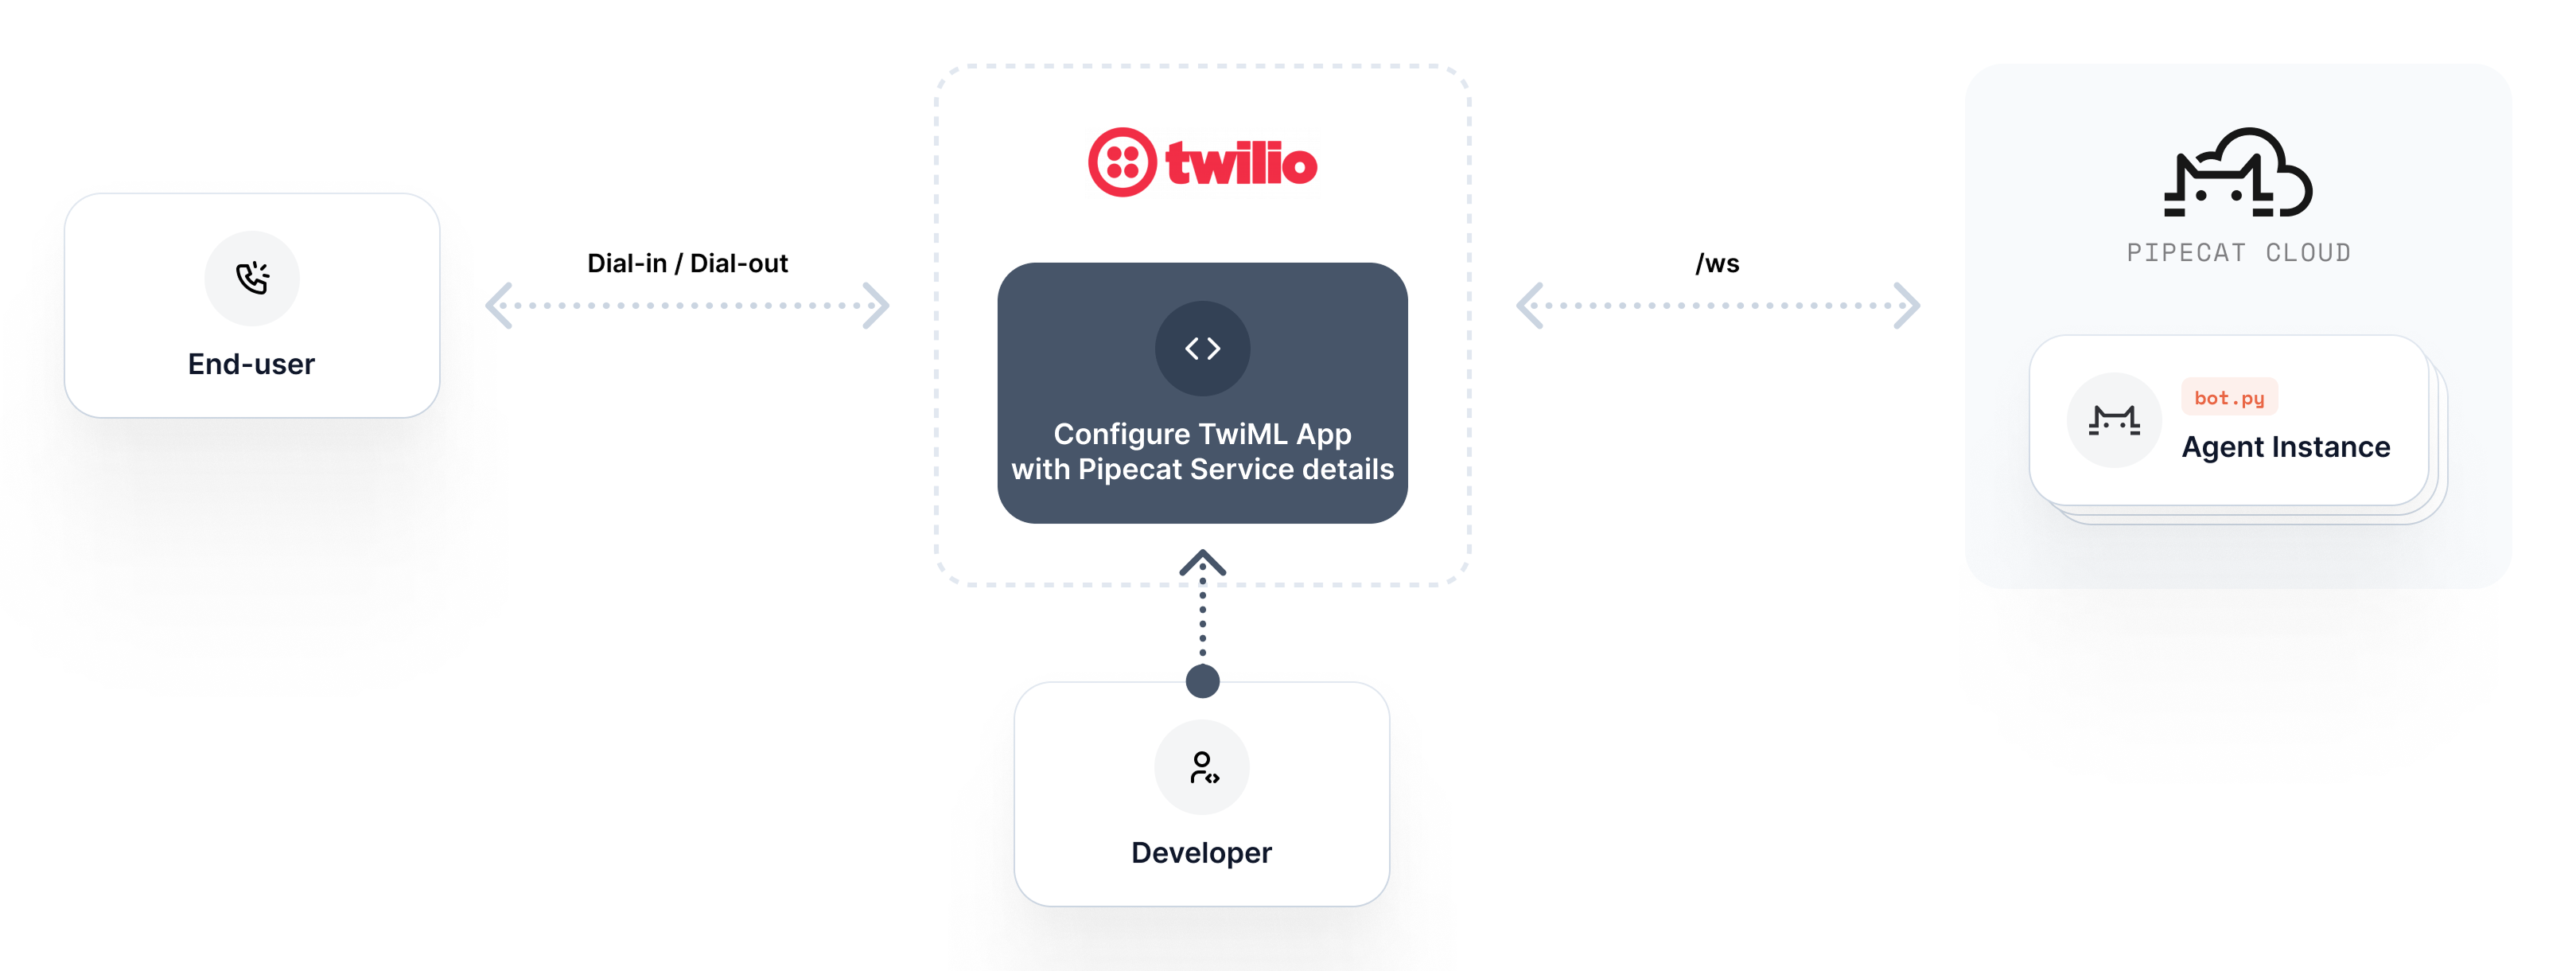
Pipecat Cloud implements Twilio’s bidirectional Media Streams protocol. While audio streams flow through WebSockets, the call session is controlled by updating the Twilio Markup Language (TwiML) associated with each call’s unique identifier (CallSid).
When Pipecat Cloud receives an incoming WebSocket connection from Twilio, it processes the Connected and Start messages to initialize a new bot instance. All WebSocket messages are forwarded to your bot, including any custom parameters set in your TwiML. This allows your bot to leverage Twilio’s REST API for advanced call control - such as recording conversations, transferring to human agents, or implementing complex call flows.
Prerequisites
Before setting up this integration, ensure you have:- A Twilio account with voice capabilities
- A Pipecat Cloud account with a Twilio Websockets-compatible bot
Pipecat Cloud Configuration
1. Get Your Organization Name
Retrieve your Pipecat Cloud organization name using the Pipecat CLI:2. Create a TwiML Bin
Purchase a phone number from Twilio if you haven’t already, then create a TwiML Bin with the following configuration:AGENT_NAMEwith your deployed bot’s name (e.g.,my-first-agent)ORGANIZATION_NAMEwith your organization name from step 1 (e.g.,three-random-words-randomnumber)
customer-support.industrious-purple-cat-12345
Using Regional EndpointsIf you deployed your agent to a specific region, use the regional WebSocket endpoint to connect:
wss://{region}.api.pipecat.daily.co/ws/twilioFor example, for Europe: wss://eu-central.api.pipecat.daily.co/ws/twilioLearn more about regional endpoints.3. Assign TwiML Bin to Your Phone Number
- Navigate to the Phone Numbers section in your Twilio dashboard
- Select your phone number from the list
- In the Configure tab, under “Voice Configuration” section, find “A call comes in”
- Set this dropdown to “TwiML Bin”
- Select the TwiML Bin you created in step 2
- Click Save to apply your changes